


Table of Contents
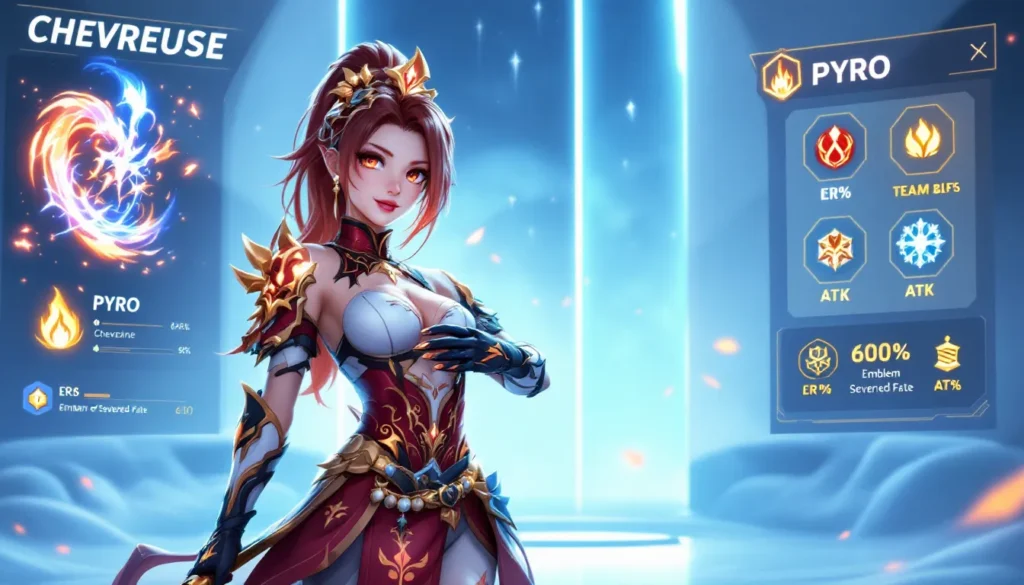
ToggleChevreuse is one of Genshin Impact’s most strategic support characters, and if you’re building a team around her in 2026, you’re looking at a character who’s genuinely unique. Unlike flashy DPS characters that dominate the spotlight, Chevreuse operates in the shadow, boosting your team’s output through careful coordination and smart positioning. She’s a Pyro polearm user from Fontaine who brings both supportive utility and surprising damage potential to the right team composition. Whether you’re tackling Spiral Abyss or exploring the overworld, understanding how Chevreuse works isn’t just helpful: it’s the difference between a clunky team and one that flows. This guide breaks down everything you need to know about building, leveling, and playing Chevreuse effectively.
Key Takeaways
- Chevreuse is a Pyro polearm support character who excels in Melt teams with Cryo DPS like Ayaka and Ganyu, applying consistent Pyro to enable reverse Melt reactions and amplify team damage.
- Energy Recharge should be your primary stat priority (160-180% minimum) when building Chevreuse, as burst uptime directly determines how frequently she can buff your team through her Elemental Burst.
- Emblem of Severed Fate is the meta artifact set for Chevreuse, converting her naturally high Energy Recharge into burst damage and ATK scaling that benefits all nearby allies exponentially.
- Chevreuse’s positioning and buff radius matter critically—place her close to teammates during her burst window to ensure they receive her ATK buff, and use her Elemental Skill off-cooldown to maintain particle generation.
- Common mistakes like neglecting ER, misunderstanding her support mechanics, or pairing her with incompatible teams waste her potential; prioritize Elemental Burst to level 9 first and farm Fontaine materials to streamline her full build.
- Weapons like Engulfing Lightning or the farmable Catch provide the ER and ATK scaling Chevreuse needs, while positioning her as a tactical support rewards careful rotation execution over raw personal damage output.
Who Is Chevreuse and What Role Does She Play?
Chevreuse is a four-star Pyro polearm character who functions as both a sub-DPS and support hybrid. Her kit revolves around coordinated attacks and team synergy rather than personal damage output. She joins your roster as part of Fontaine’s cast and brings a distinctly tactical playstyle that rewards planning and positioning.
In team composition, Chevreuse excels at enabling teammates through her Elemental Burst mechanic, which applies Pyro to enemies and buffs nearby allies. She’s particularly strong when paired with Cryo and Hydro characters since her abilities interact with elemental reactions. Unlike dedicated supports like Bennett or Nahida, Chevreuse requires more active field time and strategic ability rotation.
Her role shines brightest in two scenarios: first, in Melt teams where she can proc consistent Pyro application, and second, in Overloaded compositions where her crowd control pairs well with Electro applicators. While she won’t be your main damage dealer, she’s the orchestrator who makes your real DPS characters perform better. On platforms like PC, PlayStation, and mobile, her mechanics translate smoothly without requiring button-mashing or frame-perfect timing.
Chevreuse’s Abilities and Mechanics Explained
Chevreuse’s kit is straightforward on the surface but reveals depth once you understand the interaction between her abilities. Each component serves a purpose in her role as a tactical support unit.
Normal Attack and Charged Attack
Chevreuse’s normal attacks combo into three-hit sequences typical of polearm users. Her attack speed is moderate, and the damage scales with ATK stat. The charged attack costs stamina and deals AoE damage in a small radius, making it useful for breaking shields or hitting grouped enemies.
The real value of her normal attacks isn’t raw damage, it’s that they generate energy for her Elemental Burst. Don’t expect her normal attacks to carry damage: instead, view them as a tool to maintain uptime and generate particle economy. Against Fatui or shielded enemies, her charged attack provides decent utility without requiring special positioning.
Elemental Skill
Chevreuse’s Elemental Skill is where her tactical nature emerges. When activated, she dashes forward and slashes enemies in her path, applying Pyro and dealing Pyro damage. The skill has a moderate cooldown (around 12 seconds) and generates energy particles.
The skill’s secondary effect is where it gets interesting: it increases Pyro damage bonus for nearby Cryo teammates for a duration. This passive buff is why she pairs so well with Melt teams. Her positioning matters here, standing close to your Cryo DPS maximizes the effect duration. The dash itself provides mobility and can be used to reposition during tough encounters.
Elemental Burst
Chevreuse’s Elemental Burst is her signature move. It applies Pyro to surrounding enemies and creates an AoE effect that buffs nearby teammates. The burst duration extends if enemies remain in the area, incentivizing group play and enemy clustering.
The key mechanic: the burst increases ATK for all nearby teammates based on Chevreuse’s base ATK. This is a multiplicative damage buff that directly amplifies your main DPS’s output. The Pyro application is medium-frequency, making her viable for enabling reactions like Vaporize or Overload. Energy cost is moderate at 60 or 80 (depending on constellation level), and the cooldown is reasonable for repeated applications.
Passive Talents
Chevreuse’s passive talents solidify her support role. Her first passive increases movement speed in domains and during exploration, a quality-of-life feature that’s genuinely helpful during Spiral Abyss runs.
Her second passive talent is the game-changer: it reduces damage taken by nearby teammates for a brief duration after her Elemental Skill connects. This defensive utility is subtle but powerful in content where survivability matters, like boss fights or high-difficulty Spiral Abyss floors. The damage reduction stacks with shields and other defensive mechanics, making her genuinely tanky-adjacent even though she’s not a pure shielder.
Constellation upgrades further enhance her utility at C1 (additional skill charges) and C2 (burst cooldown reduction). These aren’t mandatory, but they significantly improve her viability in endgame content.
Best Weapons for Chevreuse
Weapon choice dramatically impacts Chevreuse’s performance. Unlike pure supports, she benefits from ATK scaling because her burst buff scales directly from her own stats. Prioritize weapons that boost ATK or provide utility that aids her team.
Five-Star Weapon Recommendations
Engulfing Lightning is arguably her best five-star option. The weapon provides massive ATK scaling and Energy Recharge, allowing Chevreuse to burst more frequently. The passive bonus converts ER directly into ATK, which stacks her buffing power exponentially. If you’re running Chevreuse in a support-heavy team where she needs consistent burst uptime, this is the premium choice.
Primordial Jade Winged-Spear is an alternative that emphasizes personal damage while maintaining reasonable support capability. Its passive increases ATK per stack, and the physical damage bonus works for her charged attacks. It’s less specialized for her support role but provides flexibility if you want Chevreuse to contribute more direct DPS during downtime.
The Catch is technically a free four-star, but I’m mentioning it here because it competes with many five-star options. If you haven’t pulled weapon banners, this is legitimately sufficient for endgame content.
Four-Star Alternatives
Wavebreaker’s Fin is exceptional if you have high ER requirements. It converts ER into ATK, similar to Engulfing Lightning but more accessible. For players using Chevreuse in reaction-heavy teams where burst uptime is critical, this weapon provides outstanding value.
Deathmatch is a solid all-rounder offering CRIT Rate and ATK bonuses. It’s particularly good if you’re using Chevreuse in a dual-carry setup where she needs respectable personal damage alongside her support utility. The CRIT stat helps scale her own damage, making her more than just a buff bot.
The Catch (if you haven’t maxed it) deserves emphasis, it’s farmable from the Inazuma fishing spots and provides Energy Recharge and CRIT DMG. Honestly, if you’re starting out, grab this. The stat efficiency is remarkable for a four-star farmable weapon.
Pike variants like Crescent Pike work if you’re desperate, but they don’t synergize well with her kit. Avoid them unless you’re purely focused on physical damage, which contradicts her role.
Optimal Artifact Sets and Stat Priorities
Artifacts are where Chevreuse’s support nature becomes crystal clear. You’re not chasing raw CRIT or CRIT DMG: instead, you’re optimizing for sustainability and team utility.
Recommended Artifact Sets
Emblem of Severed Fate (4-piece) is the meta choice for Chevreuse. The two-piece bonus grants 20% Energy Recharge, and the four-piece scales burst damage and ATK based on ER percentage. Since you’ll naturally stack ER for burst uptime, this set converts that into direct support value. Most Chevreuse builds run 160-180% ER, making Emblem’s passive almost broken in efficiency.
Noblesse Oblige (4-piece) is a classic support set that increases burst damage by 20% and grants ATK to all teammates after bursting. If your team is already using Emblem elsewhere, this is a solid alternative. The ATK buff stacks with Chevreuse’s burst buff, creating multiplicative team damage.
Millennial Movement (2-piece) combined with other ATK pieces works if you’re mixing sets. Two Millennial pieces grant 20% Energy Recharge, which you can pair with two Gladiator or Shimenawa pieces for raw ATK. This is more flexible and forgiving during early artifact farming.
Rotation strategy: Farm Emblem domains first. The domain also drops Shimenawa, which is useful for other characters, so your time investment pays dividends. Once you’ve locked in a solid Emblem set, you can experiment with other combinations.
Key Stats to Focus On
Primary stats by priority:
-
Energy Recharge (160-180% minimum). This is non-negotiable. Chevreuse needs frequent burst uptime, and ER is how you achieve it. Most builds prioritize ER% on the sands piece.
-
ATK (20-25% after ER). While ER scales into ATK with the right artifacts, dedicated ATK pieces matter. Your goblet should be Pyro DMG% if possible, but ATK% is a solid fallback.
-
CRIT Rate / CRIT DMG (only if available as substats). Don’t chase CRIT hard with main stats. If you get lucky with substats, great, but ER and ATK come first.
Specific artifact lines:
- Sands: Energy Recharge% (primary choice)
- Goblet: Pyro DMG% > ATK%
- Circlet: ATK% if your substats are solid, or ER% if you’re still far from your threshold
Substat priority: ER substats > ATK substats > CRIT Rate/DMG > Elemental Mastery (unless running Overload comps, then Mastery helps).
The beautiful part: Chevreuse’s stat requirements are forgiving. Unlike DPS characters where you need specific CRIT ratios, Chevreuse scales linearly with ER and ATK. Farm consistently, prioritize those two stats, and you’ll have a functioning support.
Team Compositions and Synergies
Chevreuse isn’t a standalone character, she’s a puzzle piece. Her real value emerges through team synergy. Understanding which teammates amplify her kit is essential for optimizing your Spiral Abyss runs.
Elemental Reaction Teams
Melt teams (Chevreuse + Cryo DPS) are her strongest archetype. Pair her with characters like Ayaka, Ganyu, or Shenhe. Here’s why: Chevreuse’s Elemental Skill buff specifically enhances Cryo damage, and her Pyro application enables reverse Melt (Cryo hits trigger Melt on Pyro). The playstyle is smooth, Chevreuse applies Pyro, then your Cryo DPS triggers massive Melt reactions. Shenhe as a sub-DPS stacks multiplicative bonuses, making the trio absurdly strong.
Vaporize comps (Chevreuse + Hydro DPS) work if you’re running Hu Tao or Alhaitham. Chevreuse applies Pyro consistently, allowing your Hydro DPS to trigger Vaporize. But, this is less optimal than Melt since Chevreuse doesn’t specialize in Pyro application the way dedicated applicators do. Still viable for casual play or if you lack better options.
Overloaded teams (Chevreuse + Electro applicator) are niche but fun. Pair her with Fischl or Beidou for consistent Electro application. The Overload reaction creates crowd control, and Chevreuse’s damage reduction passive helps mitigate the knockback. Elemental Mastery becomes more valuable here, making this comp slightly different in stat priority.
Support and Sub-DPS Pairings
Kazuha or Venti as sub-DPS/support drastically improve Chevreuse’s viability. These Anemo characters amplify elemental reaction damage and provide grouping. Venti especially, his Elemental Burst pulls enemies together, ensuring Chevreuse’s AoE buffs hit multiple targets. The damage amplification from Kazuha’s Elemental Skill stacks beautifully with Chevreuse’s ATK buff.
Bennett as a secondary buffer is redundant. Both Chevreuse and Bennett provide ATK buffs, and the buffs don’t stack multiplicatively enough to justify running both. If you’re using Chevreuse, skip Bennett for flexibility.
Kokomi or Barbara as healer/support works well. Kokomi especially, her Hydro application preps for Vaporize if Chevreuse’s Pyro is high, and her healing is strong enough to keep the team alive. Barbara’s Thrilling Tales passive provides a massive ATK buff on swap, stacking multiplicatively with Chevreuse’s burst. This combination is legitimately overpowered in casual content.
Sample Melt team: Chevreuse (support) + Ayaka (main DPS) + Shenhe (sub-DPS) + Kazuha (sub-DPS/anemo). This is high-investment but slams endgame content.
Budget Melt team: Chevreuse + Ganyu + Rosaria (sub-DPS) + Barbara (healer). Ganyu is free from the starter banner, making this surprisingly accessible.
Casual team: Chevreuse + Diluc (main DPS) + Barbara (healer) + Sucrose (Anemo support). Diluc’s Pyro DPS pairs with Chevreuse’s buffs for solid damage without demanding perfect rotations.
Chevreuse Build Variations for Different Content
Chevreuse’s flexibility means you can adapt her build depending on the challenge. Your artifacts and weapons can shift based on whether you’re exploring or grinding Abyss.
Overworld Exploration and Domain Builds
Overworld exploration doesn’t require optimization. Use whatever ATK/ER pieces you have: prioritize movement speed bonuses from artifacts if available. Your goal here is comfort, smooth rotations without fussing over CRIT ratios.
Weapon choice is flexible. The Catch is fine, Wavebreaker’s Fin is better, but even a three-star polearm works for overworld content. You’re not min-maxing here: you’re exploring and collecting resources.
Domain runs benefit from focused optimization because you’re dealing with timed challenges and threat. Run your standard Emblem setup with 160-180% ER. The tight time windows mean you need consistent burst uptime. Weapon-wise, anything that provides ER helps, The Catch, Wavebreaker’s Fin, or Engulfing Lightning if you have it.
The key difference from Abyss: you’re facing fewer enemies, so single-target damage matters slightly more. Deathmatch becomes more appealing here than Emblem’s passive, extra CRIT Rate helps scale personal damage against bosses.
Spiral Abyss and Boss Fight Strategies
High-difficulty Abyss demands your best optimization. This is where Emblem’s 4-piece and high ER become non-negotiable. You need burst every 10-12 seconds to maintain team buffs continuously.
Stat targets shift: 180%+ ER becomes standard because enemies deal burst damage phases that require frequent buffing. Your goblet should be Pyro DMG% since you’re contributing more personal damage on high floors. CRIT substats matter slightly more on Abyss floors where Chevreuse deals 30-40% of team damage.
Boss fights specifically (Scaramouche, Raiden, etc.) require adaptability. Your Pyro application might need to be faster or more consistent depending on the boss’s mechanics. Against bosses with shield phases, Chevreuse’s charged attack becomes more relevant, use it to apply extra Pyro and break shields faster.
For the most demanding content, consider running Kazuha or Venti as your fourth slot instead of a second healer. The damage amplification carries harder than extra healing when you can position well. Damage reduction from Chevreuse’s passive acts as pseudo-defense, reducing healing requirements.
Rotation example (Melt Abyss floor): Chevreuse Elemental Skill → switch to Shenhe → burst for bonus Cryo DMG → switch to Ayaka → consume the Cryo buff with burst and normal attacks → switch back to Chevreuse when her skill cooldown resets. This rhythm keeps your Cryo DPS buffed while maintaining Pyro application.
Leveling and Ascension Materials
Leveling Chevreuse follows standard Genshin progression but has specific material requirements worth planning ahead for.
Character levels 1-90: You need regular XP materials, Character EXP books and Mora. Chevreuse specifically uses Emblem artifacts for farming, so farm the Emblem domain simultaneously. This dual-purpose farming maximizes your time investment. Expect to spend around 50-60 original resin for full ascension (combining with daily ley lines).
Ascension materials for Chevreuse:
- Lilia Petals (dropped by Lilia creatures in Fontaine)
- Totem of the Fortress (dropped by Treasure Hoarders in Fontaine)
- Crystalline Cyst (dropped by Clockwork Mechs in Fontaine)
- Dendritic Silver (dropped by Dendro enemies across Teyvat)
Fontaine location matters here. Chevreuse is from Fontaine, and most of her ascension materials cluster in that region. Spend a focused session mapping out these material locations, Game8 has interactive maps showing exact spawns. This takes 1-2 hours total but prevents backtracking later.
Talent materials:
- Teachings/Guides/Philosophies of Light (from Cecilia Garden domain, clarifies which day)
- Gear from Fatui agents (weekly material from Childe or Signora)
- Crown of Insight (end-stage talent level cap remover, extremely limited)
Don’t crown Chevreuse’s talents immediately. Prioritize leveling her Elemental Burst to 9 first (damage, duration, cooldown), then her Elemental Skill to 8. Normal attack levels can wait, she’s not an AA slave. This optimization lets you spread crowns across more characters long-term.
Timeline: Plan 3-4 weeks to fully build Chevreuse from scratch if you’re farming materials daily. If you’re using existing stockpiles, expect 1-2 weeks. The Fontaine materials cluster helps significantly, unlike characters requiring materials from opposite regions, Chevreuse’s farm path is streamlined.
Common Mistakes to Avoid When Playing Chevreuse
New Chevreuse players often stumble on execution. Here are the frequent pitfalls and how to avoid them.
Mistake 1: Neglecting Energy Recharge. This is the most common error. Players chase CRIT or CRIT DMG early, then wonder why Chevreuse’s burst isn’t available consistently. Remember: you need 160%+ ER baseline. If you’re struggling with burst uptime, drop ATK substats temporarily and prioritize ER. RPG Site has tier lists highlighting support builds if you need a reference.
Mistake 2: Misunderstanding her buffing mechanics. Chevreuse’s burst buff only applies to nearby allies within a small radius. Placing her in the wrong position means your DPS doesn’t receive the buff even though her burst is active. Practice swapping to Chevreuse right before their burst window, applying her buff, then immediately switching back. The buff duration lasts long enough for optimal rotation execution.
Mistake 3: Overestimating her damage. She’s a support with respectable scaling, but she’s not a DPS. Don’t farm CRIT%/CRIT DMG% artifacts expecting her to carry. Her role is enabling teammates. Accept personal damage as a bonus, not the goal.
Mistake 4: Ignoring energy particles. Chevreuse generates particles from both her Elemental Skill and Burst. Not using her Elemental Skill enough means you’re losing particle generation. If your burst isn’t ready when you need it, check your ability rotation, are you actually cycling her Elemental Skill off cooldown?
Mistake 5: Poor team synergy choices. Running Chevreuse with random characters instead of planned synergies wastes her potential. Her Elemental Skill buff specifically boosts Cryo damage, if you don’t have a Cryo DPS, that passive is wasted. Before committing resources, verify your team has at least one character synergizing with her kit.
Mistake 6: Weapon choices that don’t scale. Using weapons without ER or ATK scaling (like Crescent Pike if you’re not building physical) leaves her starved for stats. Match your weapon to your stat targets. If you need ER, pick a weapon providing it. If you have ER covered through artifacts, pivot to ATK weapons.
Mistake 7: Forgetting positional mechanics. Her damage reduction passive requires Chevreuse to be close to teammates. Her buff radius matters. In chaotic Abyss fights, maintain positioning, don’t drift too far from your team. Proper positioning separates smooth runs from hectic ones.
Mistake 8: Relying on electro teams without EM. If you’re running Overloaded, Chevreuse needs Elemental Mastery in her build because reaction damage scales from EM. Standard ER/ATK builds underperform in Overload. Shift substats toward Mastery (500+ EM) if this is your main team comp.
Conclusion
Chevreuse is one of Genshin Impact’s most rewarding support characters to build and play, not because she’s flashy, but because she demands understanding and execution. Her mechanical depth rewards tactical players who embrace team coordination over individual damage checks. From weapon selection through artifact optimization to team assembly, every choice compounds into cohesive performance.
The 2026 meta hasn’t shifted her core identity. She remains exceptional in Melt teams, viable in Vaporize comps, and surprisingly solid as a Cryo DPS enabler. The strategies outlined here, from 160%+ ER targets to Emblem farming to positioning during rotations, form the foundation of competent Chevreuse play.
If you’re just starting with her, prioritize getting her Elemental Burst to 9 and farming Emblem artifacts. That 20% ER boost and burst scaling make everything else flow naturally. Once you’ve locked those fundamentals, experiment with team compositions and see what clicks. She pairs differently with Ayaka versus Ganyu versus Hu Tao, and part of the fun is discovering which synergy feels best in your hands.
The comprehensive resources across Twinfinite and other gaming sites offer supplementary team guides if you need inspiration. But Chevreuse’s greatest strength lies in her flexibility, she adapts to your roster, not the other way around. Build her right, position intentionally, and maintain consistent burst uptime, and you’ll find yourself using her far more than you initially expected.